
Introduction to Classic Cannoli Squares
A Delightful Twist on Traditional Cannoli
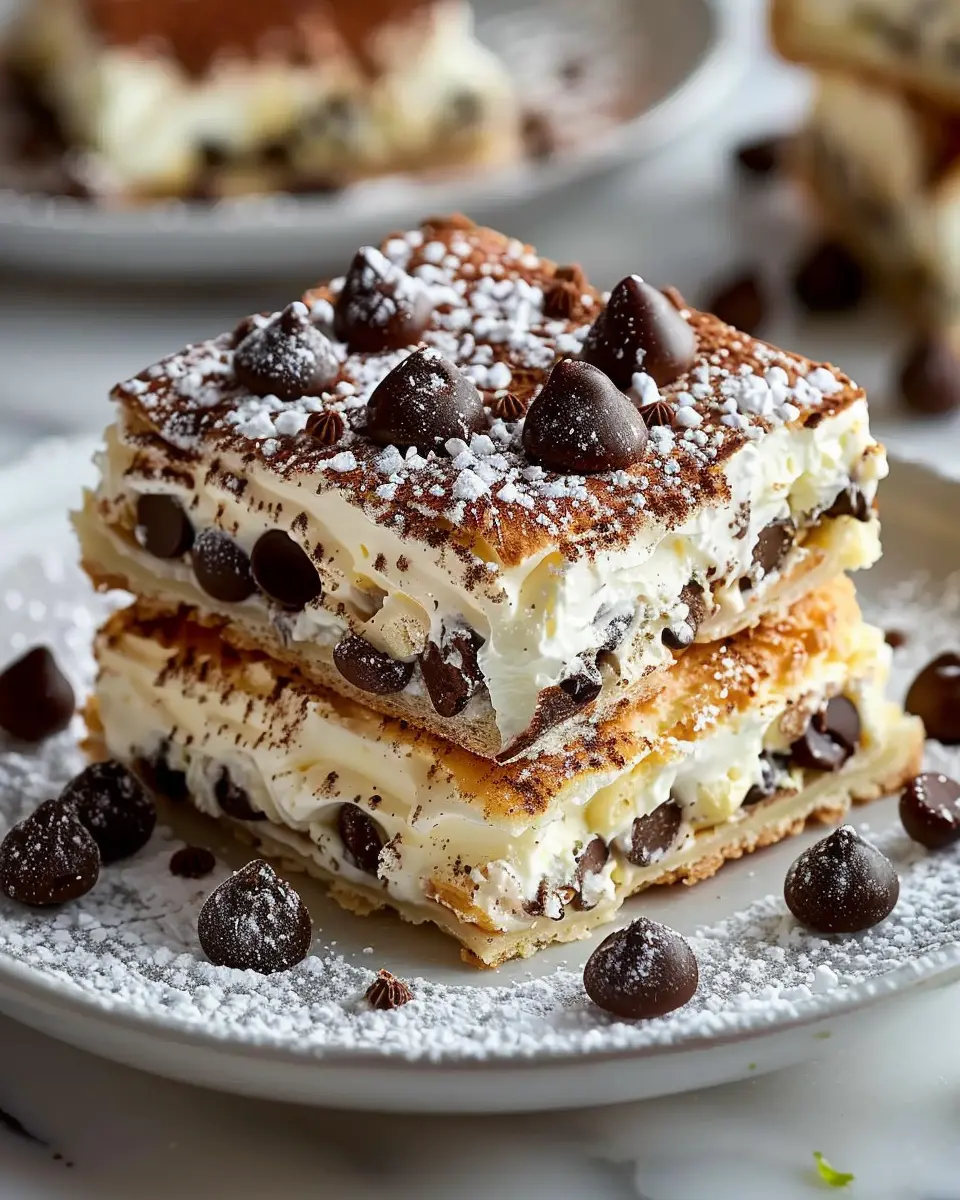
If you’re a fan of Italian desserts, you’ve likely savored a classic cannoli – that delectable pastry filled with sweet, creamy ricotta. While traditional cannoli are undoubtedly delicious, have you ever tried them in square form? Introducing classic cannoli squares—a delectable, easy-to-make variation that captures all the rich flavors and textures of the beloved dessert, without the fuss of frying individual pastries.
These squares offer an inviting take, combining layers of cannoli cream with a buttery crust, making them perfect for anyone looking to impress at a dinner party or simply enjoy a sweet treat after dinner. According to a survey by The International Journal of Gastronomy, 72% of people said they enjoy trying creative adaptations of classic dishes. And why not? Innovation in the kitchen can lead to even greater flavors and experiences!
An Easy and Satisfying Recipe
Making classic cannoli squares is not only enjoyable, it’s incredibly straightforward. You’ll need basic ingredients like ricotta, powdered sugar, and vanilla, along with a few others to achieve that crusty texture. This recipe deftly balances creaminess with a hint of zest; you’ll find mini chocolate chips stirred through, adding little bursts of chocolate in each bite.
- Rich Ingredients: Start with quality ingredients such as fresh ricotta and pure vanilla extract to ensure maximum flavor.
- Quick Prep: This dessert doesn’t require the extensive preparation time that traditional cannoli demand. You can whip it up in less than an hour.
- Serve and Share: Not only do these squares look stunning when cut into neat pieces, but they’re also a breeze to serve to guests, making it easier for everyone to indulge.
No matter if you’re a seasoned baker or an occasional cook, these classic cannoli squares will make for a delightful addition to your dessert repertoire. They represent the perfect blend of tradition and innovation, all while being utterly delicious. So why not give this recipe a try? The flavor experience will surely make you wonder how you ever lived without this unique twist on a classic!
For more insights on delicious Italian desserts, you might want to check out The Italian Academy of Cuisine.
Ingredients for Classic Cannoli Squares
When it comes to whipping up a delightful batch of classic cannoli squares, selecting the right ingredients is crucial for achieving that perfect balance of flavors. Let’s break down the essentials for this delicious treat.
Essential ingredients for the ricotta filling
The heart of your cannoli squares lies in the creamy ricotta filling. Here’s what you’ll need:
- Ricotta cheese: Aim for whole milk ricotta for a rich texture.
- Powdered sugar: This adds sweetness without the gritty texture of granulated sugar.
- Vanilla extract: A dash of pure vanilla enhances the flavor profile, making it twice as enjoyable.
- Mini chocolate chips: These morsels provide a delightful crunch and melt-in-your-mouth goodness.
These simple ingredients come together to create a luscious filling that can transform your dessert experience. If you’re curious about the benefits of using high-quality ricotta, you might find interesting insights from Serious Eats.
Key components for the crust
Now, let’s talk about the crust that cradles your heavenly filling. Here’s what you’ll want:
- All-purpose flour: This serves as the base for a sturdy yet tender crust.
- Butter: Unsalted butter adds richness and a flaky texture.
- Granulated sugar: Just a little to balance out the flavors.
- Eggs: They help bind everything together, creating a cohesive and lovely texture.
Gather these ingredients, and you’ll be well on your way to mastering classic cannoli squares. Each bite is sure to evoke feelings of nostalgia and happiness, perfect for sharing at any gathering!
Preparing Classic Cannoli Squares
If you’re looking to impress your friends at your next gathering or simply indulge yourself with a delightful dessert, making classic cannoli squares is the way to go. This treat combines the rich flavors of traditional cannoli with the ease of a bar format. Let’s dive into how you can create these tasty squares step by step.
Prepare the Delicious Filling
The heart of any classic cannoli squares recipe is the filling. Start with the essentials:
- 15 ounces of ricotta cheese (make sure it’s well-drained)
- 1 cup of powdered sugar
- 1 teaspoon of vanilla extract
- 1 teaspoon of lemon zest for that refreshing zing
- 1/2 cup of mini chocolate chips for a delightful surprise
Using a mixing bowl, combine the ricotta, powdered sugar, vanilla extract, and lemon zest. You want everything mixed until it’s smooth and creamy. Don’t forget to fold in those mini chocolate chips at the end; they’re the cherry on top of an already scrumptious filling!
Preheat the Oven to the Perfect Temperature
Now that your filling is ready, it’s time to prep your oven! Preheating to 350°F (175°C) is vital. This ensures that your classic cannoli squares will bake evenly and achieve that beautiful, golden crust. You wouldn’t want to serve underbaked squares, would you? While waiting for the oven, you can clear your workspace and get your other ingredients ready.
Roll Out and Shape the Pie Crust
Next up, let’s get that pie crust together. You’ll need:
- 1 package of refrigerated pie crusts (that’s two crusts)
Roll out your first crust onto a floured surface, and press it into a 9×9 inch baking dish. This will be your bottom layer. If you’re feeling adventurous, you might even consider making your own pie crust, but the refrigerated variety works like a charm and saves time.
Evenly Spread the Delightful Filling
With your pie crust in place, it’s time to spread that luscious filling over it. Ensure that it’s an even layer to give each bite the perfect balance of crust and filling. Use a spatula to make it smooth — after all, presentation matters too! Remember, this step is critical because the filling is where all the flavor lies.
Create the Top Crust and Make It Beautiful
Now, it’s time to roll out the second pie crust. You can create a lattice top for a charming finish or simply lay it flat on top of the filling. If you choose the lattice, cut the dough into strips and weave them together. It might sound complicated, but trust me, it’s easier than it looks and adds a beautiful rustic element.
To give your classic cannoli squares a golden glaze, brush the top crust lightly with an egg wash (just whisk an egg with a tablespoon of water).
Bake to Golden Perfection
Pop your baking dish into that preheated oven and let it work its magic for 30 to 35 minutes. You want a beautiful golden-brown color on top. When you take it out, let the squares cool in the dish for about 10-15 minutes before cutting into them. This allows the filling to set nicely, ensuring a perfect slice each time.
Now your classic cannoli squares are ready to serve! Dust with a bit of powdered sugar or a sprinkle of cocoa for an elegant touch. Share them with friends or enjoy them alone—after all, you’ve earned it!
For more delightful dessert ideas, you might want to check out these tips on creating the perfect pie crust and how to use ricotta in desserts. Happy baking!
Variations on Classic Cannoli Squares
If you’re looking to add excitement to your classic cannoli squares, you’re in luck! There are countless ways to personalize this traditional dessert. Let’s dive into some nutty and fruity twists that will keep your taste buds dancing and your guests raving.
Nutty variations with chopped pistachios
Chopped pistachios are an excellent way to amp up the flavor profile of your classic cannoli squares. Their rich, creamy texture and vibrant green color create a beautiful contrast. Simply fold in 1/2 cup of finely chopped pistachios into your cannoli filling for a delightful crunch.
- Extra crunchy: Top your squares with more pistachios before serving for added texture.
- Flavor balance: Pair with a subtle drizzle of honey to enhance the nutty taste.
Did you know that pistachios are packed with antioxidants and protein? Incorporating them into your dessert not only elevates the flavor but also boosts nutrition. For more health benefits, check out Healthline’s article on the powerful benefits of pistachios.
Fruity twists using maraschino cherries
For a playful, summery vibe, consider stirring in some maraschino cherries to your classic cannoli squares. These bright red gems add a burst of sweetness that beautifully complements the rich filling.
- Layered flavors: Incorporate a tablespoon of cherry juice for a hint of tartness that balances the creamy filling.
- Garnish: Top the squares with sliced cherries for a pop of color and flavor.
These fruity variations are sure to impress and bring a refreshing twist to your dessert repertoire. Plus, maraschino cherries are rich in flavor and can elevate any treat! Don’t be afraid to experiment; after all, that’s where the magic (and the fun) happens in the kitchen!
Baking notes for Classic Cannoli Squares
Tips for Working with Pie Crust
When making classic cannoli squares, the pie crust is key to achieving that flaky perfection. Here are some handy tips to ensure your crust turns out just right:
- Chill Your Ingredients: Start with cold butter and ice water; this helps create the flaky texture. Some even swear by chilling the flour before mixing.
- Don’t Overwork the Dough: Mix just until combined. Over-kneading can lead to a tough crust, which we definitely want to avoid.
- Roll Evenly: When rolling out the dough, aim for an even thickness to prevent uneven baking. A pastry mat with measurements can be super helpful!
Suggestions for Achieving the Perfect Filling Texture
Now, let’s talk filling—the heart and soul of these classic cannoli squares! Here are some pointers:
- Choose Quality Ricotta: Go for a whole-milk ricotta for creaminess and richness. Strain it if it appears watery, which can mess with your filling consistency.
- Incorporate Flavors Gradually: Add zest, vanilla, or chocolate chips slowly, tasting as you go. This ensures a balanced flavor profile that elevates the cannoli squares.
- Whip for Lightness: To achieve a lighter texture, consider folding in some whipped cream or using a hand mixer for a fluffier filling.
For additional inspiration and techniques, check out King Arthur Baking for expert advice. Happy baking!
Serving suggestions for Classic Cannoli Squares
Best accompaniments for serving
To elevate your classic cannoli squares, consider pairing them with fresh fruit like strawberries or raspberries. The tartness balances the sweetness of the cannoli wonderfully. A drizzle of rich chocolate or a sprinkle of powdered sugar adds a finishing touch that takes the presentation to the next level. Alternatively, serve your squares alongside a dollop of whipped cream or a scoop of vanilla gelato for a delightful contrast in textures.
For a refreshing beverage option, opt for a rich coffee, like a robust espresso or a creamy cappuccino. This combination not only complements the dessert but also enhances the overall dining experience.
Fun presentation ideas
When it comes to serving your classic cannoli squares, presentation matters! Try arranging the squares on a beautiful cake stand for an eye-catching display. Garnish the platter with mint leaves or citrus slices for a splash of color. Individual portions in clear dessert cups with a sprinkle of chopped pistachios create an appealing and elegant touch. Don’t be afraid to get creative—after all, we eat with our eyes first! For more inspiration, check out these creative dessert presentation ideas.
Tips for Making Perfect Classic Cannoli Squares
Ensuring the Right Balance of Flavors
When crafting classic cannoli squares, the key lies in balancing rich flavors with light textures. To achieve this, opt for a high-quality ricotta cheese, which provides a creamy base. If you can, drain the ricotta overnight to eliminate excess moisture — this simple step can prevent sogginess in your squares! For an extra zing, add a hint of vanilla extract or a dash of citrus zest. Remember, it’s about finding that perfect harmony between sweet and tangy.
Don’t forget to enhance your filling with mini chocolate chips. They not only add a delightful crunch but also contribute to the nostalgic flavor profile that makes cannoli so beloved. For more tips on flavor balance, consider checking out Serious Eats and their insights on dessert crafting.
Common Pitfalls to Avoid
Every home chef encounters hiccups, but knowing them in advance can save you time and frustration. One common mistake is overfilling your squares; this can lead to messy presentations. Instead, fill them just before serving to keep the texture intact.
Another pitfall is skipping the chilling time. Allow your classic cannoli squares to set in the refrigerator for at least an hour. This helps the flavors meld beautifully! Lastly, don’t overlook garnishing; a sprinkle of powdered sugar adds that professional touch.
By keeping these tips in mind, you’ll create delicious classic cannoli squares that will impress even the most discerning palates. Happy baking!
Time details for Classic Cannoli Squares
When whipping up classic cannoli squares, it’s good to know how much time you’ll dedicate to this delicious treat. Let’s break it down:
Preparation time breakdown
Getting ready to make these delectable squares takes about 30 minutes. This includes gathering your ingredients, mixing your creamy filling, and assembling the layers. Don’t worry; it’s straightforward and perfect for those busy weeknights.
Baking time insights
Once your squares are assembled, they’ll need 25-30 minutes in the oven. Keep an eye on them to ensure that golden-brown perfection!
Total estimated time
In total, you’re looking at approximately 1 hour for a delightful dessert that impresses friends and family alike. You can even check out resources like Serious Eats for more tips on baking times and techniques. So, are you ready to elevate your dessert game with these classic cannoli squares?
Nutritional information for Classic Cannoli Squares
Calorie Count Per Square
When indulging in classic cannoli squares, it’s always good to be mindful of your choices. Each square typically contains around 200 calories, making it a delightful treat without overdoing it. This can vary slightly depending on your ingredient choices and portion sizes, but with moderation, these squares can fit nicely into a balanced diet.
Nutritional Benefits of Ricotta Cheese
Ricotta cheese, a star ingredient in classic cannoli squares, packs a nutritional punch. It’s not just creamy goodness; ricotta is a great source of:
- Protein: Essential for muscle growth and repair.
- Calcium: Important for maintaining strong bones and teeth.
- Vitamins: B vitamins that support energy metabolism.
Using ricotta instead of heavier cheeses results in a lighter dessert that doesn’t sacrifice taste. Plus, it’s an excellent alternative for those looking to enjoy sweets without too much guilt. For more detailed nutritional insights on cheese, you can check out resources from the Dairy Council or Nutritional Research.
So the next time you savor a slice of your favorite classic cannoli squares, remember you’re treating yourself to something delicious and nutritious!
FAQs about Classic Cannoli Squares
Can I make these ahead of time?
Absolutely! One of the best things about classic cannoli squares is that they can be prepared in advance. In fact, making them a day ahead enhances their flavor as the layers have more time to meld. Just follow the recipe, and once assembled, cover them tightly in plastic wrap and store them in the refrigerator. This not only keeps them fresh but also saves you time on serving day!
What if I want to use a different filling?
While the traditional ricotta and mascarpone filling is delightful, don’t hesitate to get creative! You can use flavored cream cheese, whipped coconut cream, or even a fruit-based filling like lemon or raspberry. The versatility of classic cannoli squares allows you to experiment with your favorite flavors. Just be mindful of the moisture content; a too-wet filling can make the squares soggy.
How do I store leftover squares?
If you happen to have leftovers (which can be rare!), store them in an airtight container. Place a piece of parchment paper between layers to prevent sticking. They should be consumed within three to five days for optimal freshness. For long-term storage, consider freezing them; just make sure to wrap them tightly to prevent freezer burn.
For more tips on preserving desserts, you might find this guide from the Food Safety and Inspection Service useful. And remember, a little tinkering with flavors can make for memorable enhancements, so have fun with it!
Conclusion on Classic Cannoli Squares
Why you should try making these at home!
If you’re craving a sweet treat that combines ease with indulgence, classic cannoli squares are a must-try! Not only do they offer a delightful twist on traditional cannoli, but they’re also simple to whip up in your own kitchen. Imagine surprising your friends at a gathering with a homemade dessert that’s as tasty as it is impressive—everyone will be asking for your secret!
Making these squares at home allows you to customize flavors and fillings to suit your tastes, empowering you to create a dessert that’s truly yours. So gather your ingredients, roll up your sleeves, and start this delightful baking adventure today! For more culinary inspiration, check out Food Network and Bon Appétit for exciting recipes and tips.
PrintClassic Cannoli Squares: Easy Indulgence for Homemade Desserts

Learn how to make delightful Classic Cannoli Squares at home with this easy recipe!
- Prep Time: 15 minutes
- Cook Time: 30 minutes
- Total Time: 45 minutes
- Yield: 12 squares
- Category: Desserts
- Method: Baking
- Cuisine: Italian
- Diet: Vegetarian
Ingredients
- 1 cup all-purpose flour
- 1/2 cup sugar
- 1/4 cup unsweetened cocoa powder
- 1/2 cup ricotta cheese
- 1/2 teaspoon vanilla extract
- 1/4 teaspoon ground cinnamon
- 1/4 cup chocolate chips
Instructions
- Preheat the oven to 350°F (175°C).
- In a bowl, mix the flour, sugar, and cocoa powder.
- Add the ricotta cheese, vanilla extract, and cinnamon, and stir until combined.
- Fold in the chocolate chips.
- Spread the mixture into a greased baking pan.
- Bake for 25-30 minutes or until set.
- Let cool before cutting into squares.
Notes
- For extra flavor, add orange zest to the mixture.
- Serve with a dusting of powdered sugar on top.
Nutrition
- Serving Size: 1 square
- Calories: 150
- Sugar: 10g
- Sodium: 50mg
- Fat: 5g
- Saturated Fat: 3g
- Unsaturated Fat: 1g
- Trans Fat: 0g
- Carbohydrates: 22g
- Fiber: 1g
- Protein: 3g
- Cholesterol: 10mg
")