
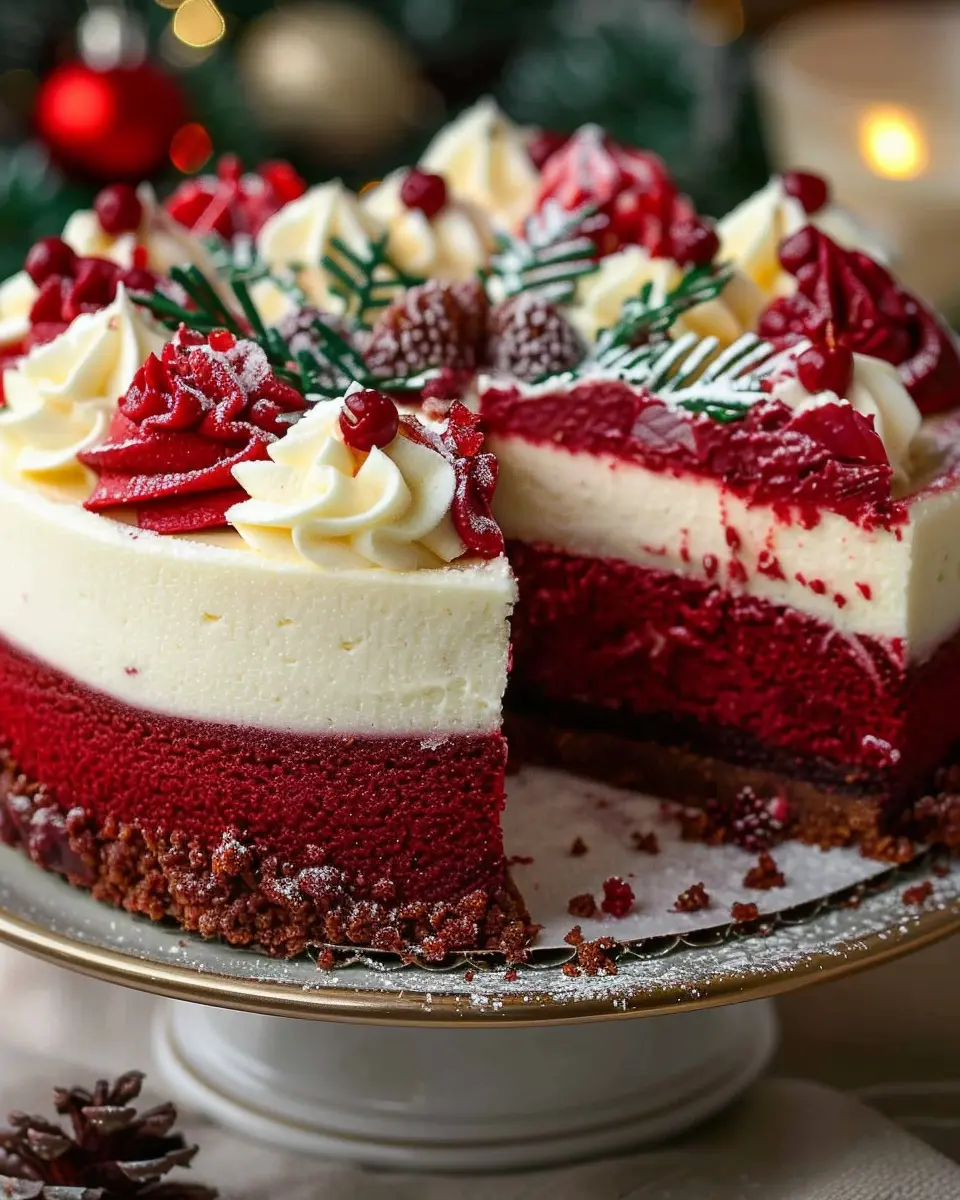
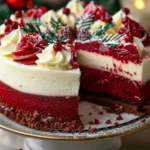
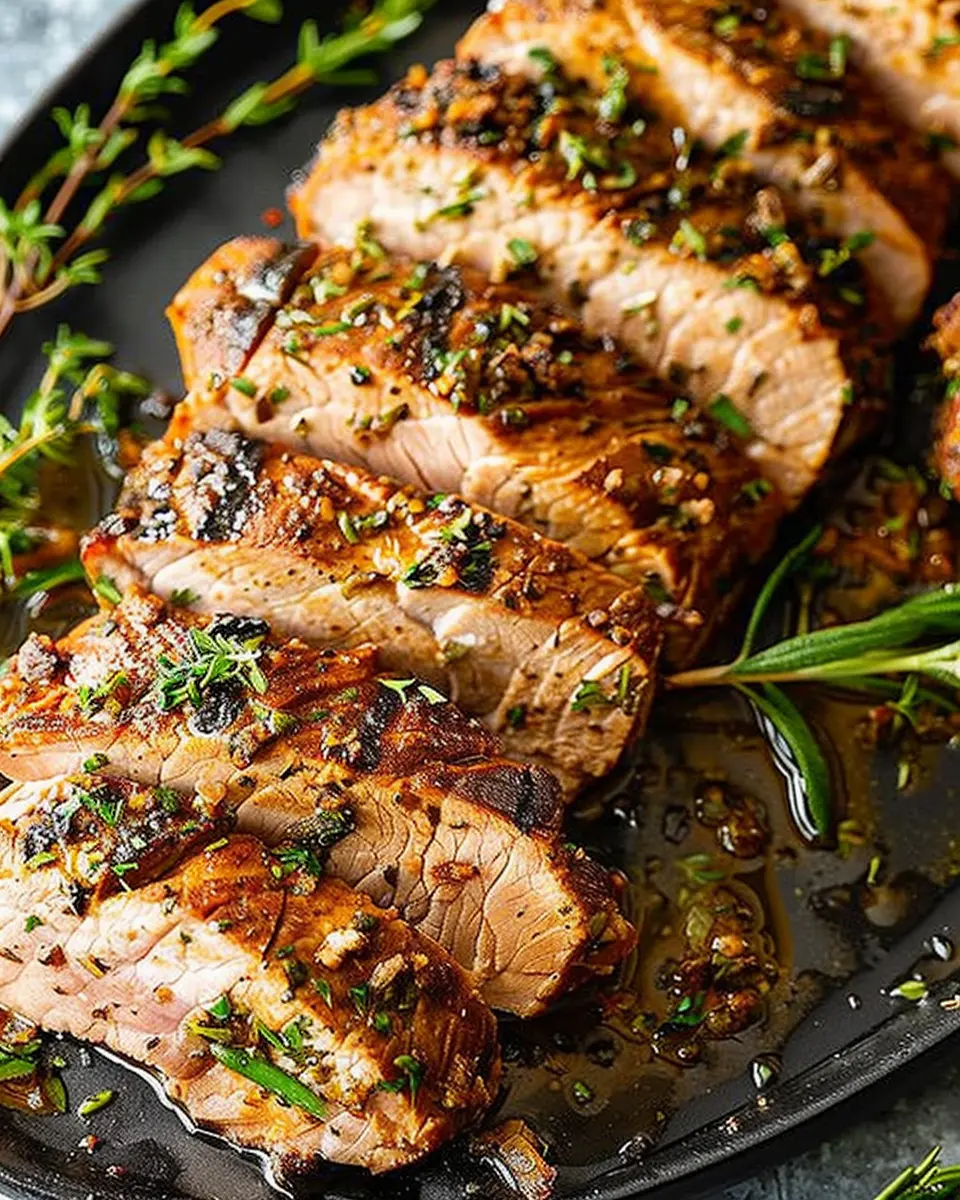
Introduction to Christmas Red Velvet Cheesecake
There’s something undeniably magical about the holiday season, and Christmas Red Velvet Cheesecake embodies that spirit perfectly. Imagine a rich, velvety cheesecake, wrapped in a vibrant red hue, topped with a swirl of creamy frosting. It’s an eye-catching centerpiece that’s sure to impress any guest at your holiday gatherings. So, what truly makes this dessert a festive favorite?
The Allure of Christmas Red Velvet Cheesecake
For starters, red velvet is a classic holiday flavor. Its deep, rich color is a nod to the season of joy and warmth, making it feel incredibly special. But it’s not just about the visuals; the combination of cocoa, tangy cream cheese, and buttery crust creates an explosion of flavor that leaves your taste buds dancing. According to the American Institute of Baking, red velvet has gained immense popularity, especially during the holiday season, because of its unique taste and stunning presentation.
A Romantic Tradition
The tradition of red velvet cake dates back to the 1920s, and over the years, it transformed into a beloved favorite during Christmas. Maybe it reminds you of family gatherings where dessert is the highlight of the meal. Perhaps you’ve shared a slice with a loved one by a cozy fireplace, creating wonder-filled memories that last a lifetime. Those moments are what Christmas is truly about, and this cheesecake adds just the right touch of decadence and nostalgia to your celebrations.
A Perfect Addition to Your Holiday Table
Whether you’re hosting a festive dinner or bringing dessert to a holiday potluck, this Christmas Red Velvet Cheesecake is bound to steal the show. Imagine serving it alongside a steaming mug of hot cocoa or a cozy cup of apple cider—the perfect pairing! Plus, the versatile recipe allows room for your own creative spin, maybe by adding a sprinkle of crushed peppermint or a drizzle of chocolate.
As you dive into making this delightful dessert, you’re not just baking; you’re creating moments, fostering connections, and celebrating the joy of the season. Stay tuned for the full recipe and tips that’ll have your friends and family raving about your holiday dessert prowess!
Ingredients for Christmas Red Velvet Cheesecake
Creating the ultimate Christmas Red Velvet Cheesecake is all about balancing flavors and textures. Here, I’ll break down the ingredients you’ll need for each layer to achieve that festive perfection!
Red Velvet Cake Layers
To start, you’ll want to gather:
- 2 cups all-purpose flour – This serves as the foundation of your cake.
- 1 ½ cups granulated sugar – Sweetness is essential.
- ½ cup unsweetened cocoa powder – This adds depth and richness.
- 1 teaspoon baking soda – For that delightful rise.
- 1 teaspoon salt – A must for enhancing flavors.
- 1 cup vegetable oil – Keeps the cake moist.
- 1 cup buttermilk – This will give you that velvety texture.
- 2 large eggs – Binding everything together.
- 2 tablespoons red food coloring – The star of the show!
- 1 teaspoon vanilla extract – For that aromatic touch.
Cheesecake Layer
Next up is the creamy cheesecake layer. Gather the following:
- 16 ounces cream cheese – The hero of this layer; make sure it’s softened for smooth mixing.
- ½ cup sour cream – Adds a tangy flavor that perfectly offsets the sweetness.
- 1 cup granulated sugar – Creamy and sweet!
- 3 large eggs – Ensure these are at room temperature for better blending.
- 1 teaspoon vanilla extract – Smooth and aromatic.
Cream Cheese Frosting
Finally, let’s make that luscious cream cheese frosting to top it all off:
- 8 ounces cream cheese – Again, soften this for a smooth consistency.
- ½ cup unsalted butter – Adds richness to the frosting.
- 4 cups powdered sugar – Sweet enough to complement but not overpower.
- 1 teaspoon vanilla extract – Because more of a good thing is always better!
With these ingredients, you’ll be well on your way to impressing your guests this holiday season. Don’t forget to check out more tips on achieving the perfect cheesecake consistency at Cheesecake Lovers and decorating ideas on The Spruce Eats! Happy baking!
Preparing Christmas Red Velvet Cheesecake
Creating a stunning Christmas Red Velvet Cheesecake is not just about following a recipe; it’s about embracing the holiday spirit and sharing a delicious treat with loved ones. So, roll up your sleeves, and let’s dive into the wonderful world of festive baking!
Gather your ingredients
Your first step is to gather all the ingredients you need to craft this holiday delight. Here’s a simple checklist to help you out:
-
For the cheesecake layer:
-
Cream cheese (24 oz.), softened
-
Granulated sugar (1 cup)
-
Sour cream (1 cup)
-
Eggs (3 large)
-
Vanilla extract (2 teaspoons)
-
Cocoa powder (1 tablespoon)
-
For the red velvet cake layers:
-
All-purpose flour (2 ½ cups)
-
Baking powder (1 teaspoon)
-
Baking soda (1 teaspoon)
-
Granulated sugar (1 ½ cups)
-
Vegetable oil (1 cup)
-
Eggs (2 large)
-
Buttermilk (1 cup)
-
Red gel food coloring (2 tablespoons)
-
Vanilla extract (1 teaspoon)
-
Salt (½ teaspoon)
-
For the cream cheese frosting:
-
Cream cheese (8 oz.), softened
-
Butter (½ cup), softened
-
Vanilla extract (1 teaspoon)
-
Powdered sugar (4 cups)
Having everything organized will streamline your process. Plus, who doesn’t love the satisfaction of getting ready before diving into a delicious project?
Bake the cheesecake layer
Now that your ingredients are in place, it’s time to create the creamy, dreamy cheesecake layer. Preheat your oven to 325°F (160°C). In a large mixing bowl, combine the softened cream cheese and granulated sugar, mixing until you achieve a smooth, velvety texture. Next, add in the sour cream, eggs, and vanilla extract, mixing gently to avoid over-beating.
Pour this lovely mixture into a springform pan and bake it for about 45-50 minutes. Your goal is a light jiggle in the center — this means your cheesecake will finish setting as it cools.
Prepare red velvet cake layers
While your cheesecake is baking away, let’s whip up those vibrant red velvet cake layers. In a separate bowl, whisk together the flour, baking powder, baking soda, and salt. In another bowl, combine sugar, vegetable oil, and eggs, beating until well mixed. Gradually add your dry ingredients to the wet mixture, alternating with buttermilk and the red food coloring until everything is combined.
Divide the batter equally into two 9-inch round cake pans and bake at 350°F (175°C) for 25-30 minutes. Once baked, allow them to cool completely on a wire rack.
Make the cream cheese frosting
No Christmas Red Velvet Cheesecake would be complete without a dollop of rich cream cheese frosting. Start by beating the softened cream cheese and butter together until fluffy. Gradually add in the powdered sugar and vanilla, making sure you mix long enough for it to reach the perfect frosting consistency—smooth and spreadable.
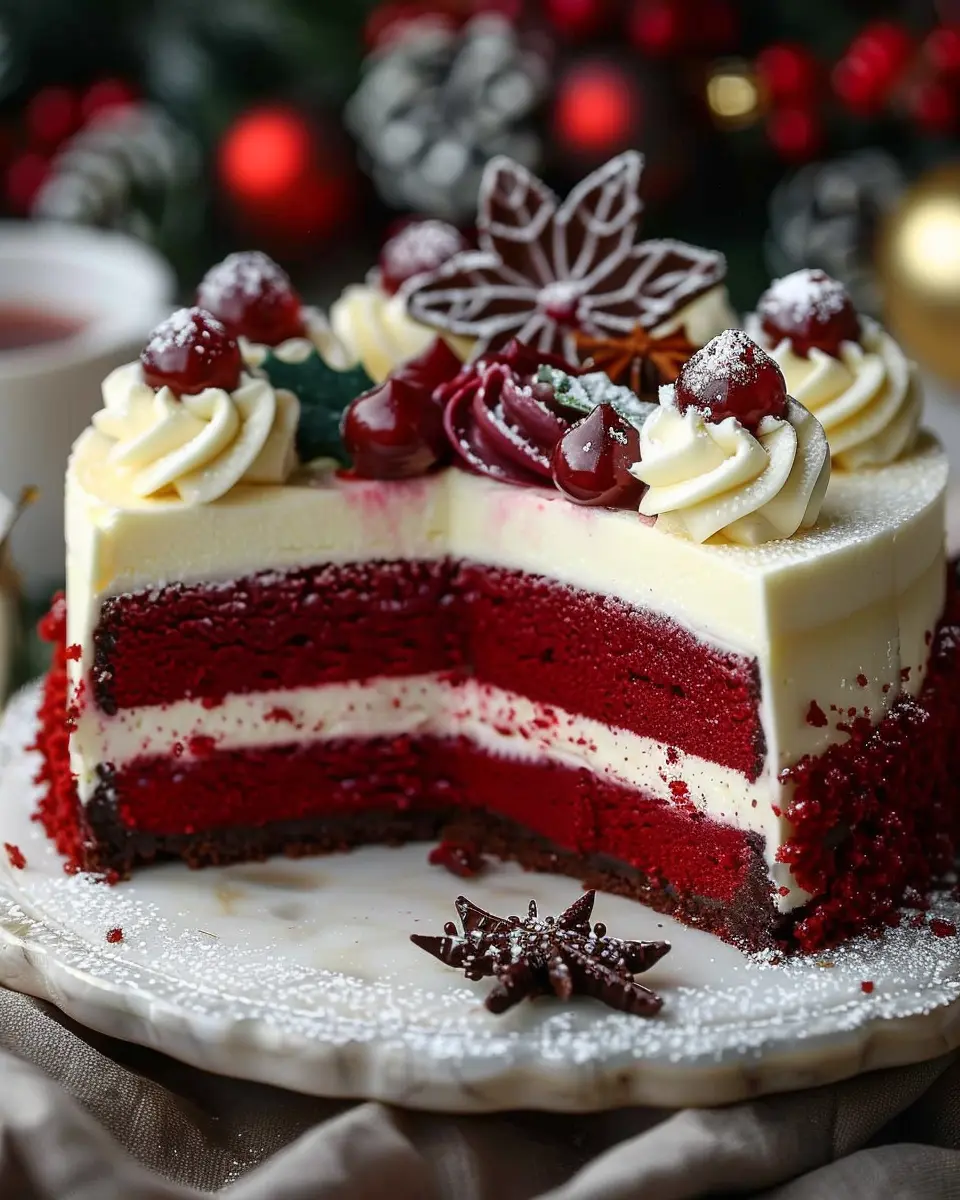
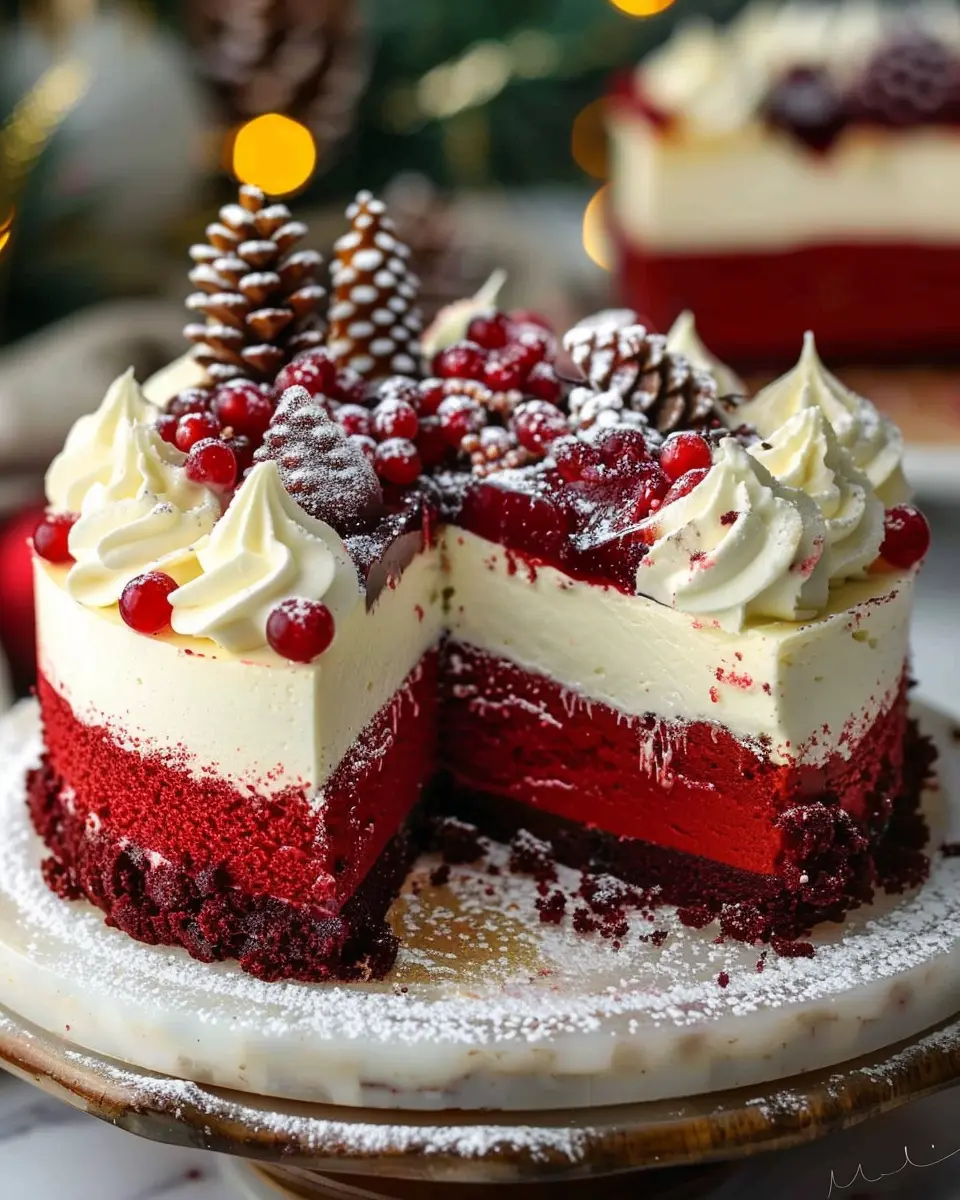
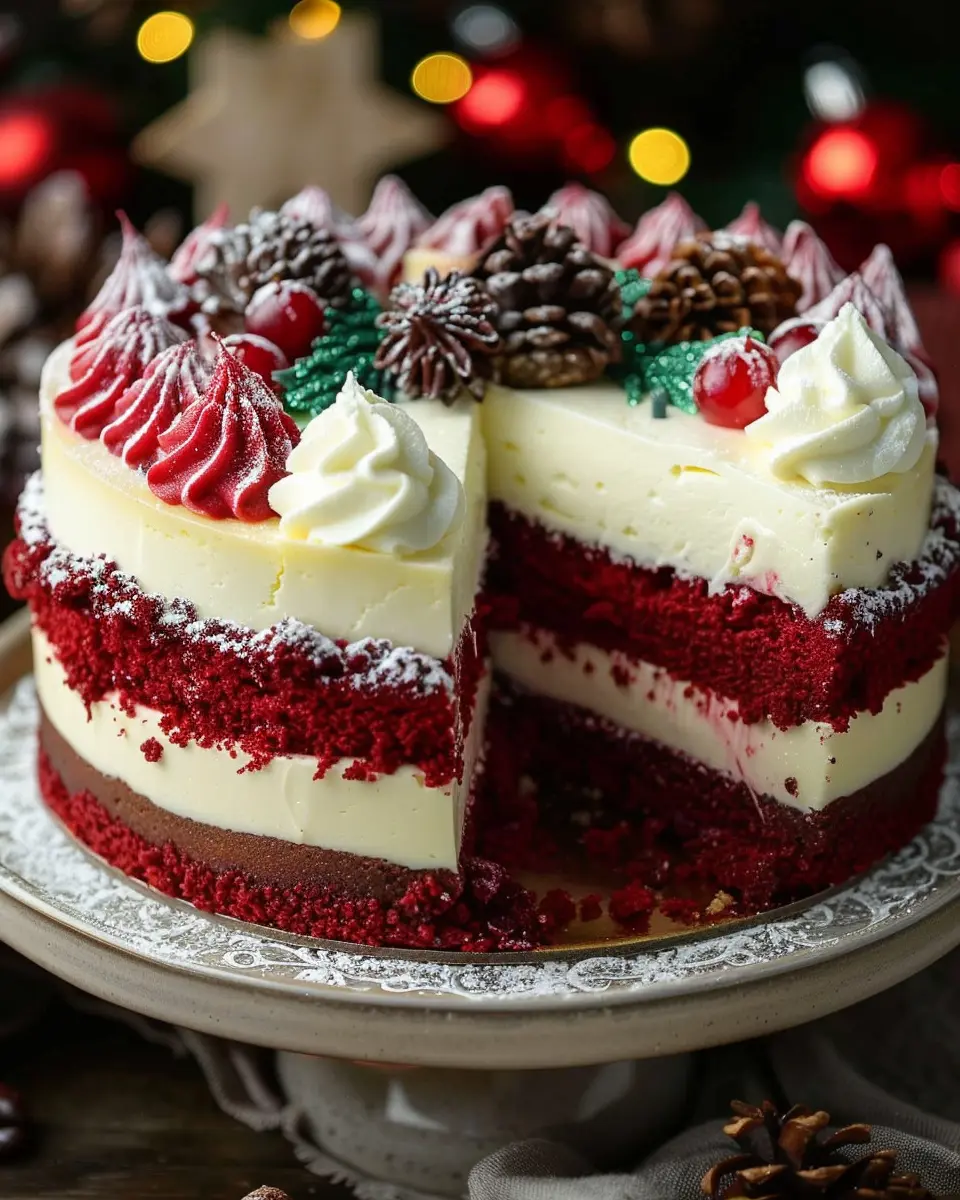
Assemble the cheesecake
Now for the fun part! Layer your cheesecake between the red velvet cake rounds. Start with your first layer of red velvet, spread a generous layer of cream cheese frosting, followed by the cheesecake layer. Repeat this process until all components are stacked high and beautiful.
Chill before serving
Finally, it’s crucial to let your Christmas Red Velvet Cheesecake chill in the refrigerator for at least 4 hours, preferably overnight. This not only helps the flavors meld together beautifully but also ensures your layers hold their shape when you slice into that scrumptious masterpiece.
Serving up a slice of this festive cheesecake will surely be the highlight of any holiday gathering! Whether you enjoy it with a warm cup of hot chocolate or a nice cup of roasted herbal tea, the taste of the holidays will be right there with you.
Incorporating this eye-catching dessert into your festive lineup is a sure way to impress your guests and spread the holiday cheer. Happy baking!
Variations on Christmas Red Velvet Cheesecake
Mini Christmas Red Velvet Cheesecakes
If you’re looking for a charming way to enjoy Christmas red velvet cheesecake, mini versions are a delightful option! These bite-sized treats are perfect for holiday parties or as gifts. Simply use a muffin tin or mini springform pans to create individual servings. The best part? You can still play with the classic cream cheese frosting by swirling in some peppermint or citrus zest for an unexpected twist. Have you ever considered adding festive toppings like crushed candy canes or a sprinkle of edible glitter? It’s all about that holiday flair!
No-Bake Red Velvet Cheesecake
For those who prefer an easy, fuss-free dessert, a no-bake red velvet cheesecake is the way to go. This variation cuts out the baking entirely and relies on the coolness of the refrigerator to set. Start with a buttery graham cracker crust, then mix together cream cheese, whipped cream, and a hint of cocoa powder for that traditional red velvet flavor. Want to level it up? Try folding in some crushed berries to complement the rich flavors. Plus, this version is perfect if you’re short on time or don’t want to heat up the kitchen.
No matter which variation you choose, these Christmas red velvet cheesecakes are sure to impress and bring a pop of color to your festive gatherings! For more tips and decoration ideas, check out sources like Taste of Home or Food Network. Happy baking!
Baking notes for Christmas Red Velvet Cheesecake
Importance of room temperature ingredients
When it comes to your Christmas Red Velvet Cheesecake, starting with room temperature ingredients is a game-changer. This step ensures that your cream cheese blends smoothly, creating that delightful creamy texture we all love. Cold ingredients can lead to lumps, making your cheesecake less than perfect. To achieve the best results, take your eggs and cream cheese out of the fridge at least an hour before you begin. Don’t rush this crucial step—your future cheesecake will thank you!
Tips for achieving the perfect texture
- Mix gently: Overmixing can introduce excess air, ruining that dense, velvety texture. Mix until just combined.
- Bake at the right temperature: A water bath can help maintain an even temperature while baking, preventing cracks on the surface. Plus, who doesn’t love a little extra moistness in their cheesecake?
- Cool gradually: Letting your cheesecake cool in the oven with the door ajar helps avoid sudden temperature changes that might make it crack.
For more insights, check out expert baking tips at Food Network. Happy baking!
Serving suggestions for Christmas Red Velvet Cheesecake
Festive garnishes
Elevate your Christmas Red Velvet Cheesecake with some delightful garnishes. Consider topping each slice with a dollop of whipped cream—light and airy, it provides the perfect contrast to the rich flavors. To add a pop of color, sprinkle edible glitter or crushed peppermint candies on top. Fresh berries, like raspberries or strawberries, not only enhance the visual appeal but also introduce a refreshing tartness that balances the sweetness. A drizzle of dark chocolate ganache can also add a touch of elegance and a pleasing bitterness to round out the flavors.
Pairing options for a holiday spread
When planning your holiday menu, think about what complements your Christmas Red Velvet Cheesecake. Serve it alongside slices of turkey bacon or chicken ham for a savory contrast. A side of warm, spiced apple cider or herbal tea can maintain that cozy vibe perfect for Christmas gatherings. For a pop of crunch, consider a mixed greens salad with a light vinaigrette; it perfectly offsets the cheesecake’s indulgence. You might also explore additional dessert options—mini gingerbread cookies or a fruit tart can offer delicious variety and keep your guests delightfully surprised!
Integrating these ideas can turn a simple dessert into a festive centerpiece, making your holiday celebration unforgettable! For more inspiration, check out this festive dessert guide.
Tips for Successful Christmas Red Velvet Cheesecake
Creating a stunning Christmas red velvet cheesecake can feel daunting, but with the right tips, you can ensure your dessert turns out perfectly every time!
Preventing Cracks in the Cheesecake
Cracks in your cheesecake can be disappointing, but they’re often preventable! Here are a few tips:
- Room Temperature Ingredients: Make sure your cream cheese and eggs are at room temperature. This helps create a smoother batter, reducing the chances of cracks.
- Avoid Overmixing: While you want to ensure all the ingredients are combined well, overmixing can incorporate too much air. A gentle mix is key.
- Water Bath Method: Baking your cheesecake in a water bath helps regulate the temperature and provides moisture, further reducing cracks. Wrap your springform pan in aluminum foil to prevent water from seeping in.
To read more about preventing cracks in cheesecakes, check out Serious Eats.
Ensuring Even Baking for Red Velvet Layers
Achieving evenly baked red velvet layers makes for a showstopping cheesecake. Here’s how:
- Proper Oven Temperature: Always preheat your oven and use an oven thermometer to check accuracy. An even temperature ensures your layers bake uniformly.
- Use Parchment Paper: Line the bottoms of your pans with parchment paper. This not only helps with easy removal but also promotes even cooking.
- Check for Doneness: Insert a toothpick into the center; if it comes out clean or with a few moist crumbs, your layers are done!
With these tips, your Christmas red velvet cheesecake will impress friends and family alike. Happy baking!
Time details for Christmas Red Velvet Cheesecake
When planning your holiday festivities, knowing the timing for your Christmas red velvet cheesecake can make all the difference. Here’s a quick breakdown to help you stay organized:
Preparation time
Get your holiday spirit flowing with about 15-20 minutes of preparation. This includes gathering your ingredients, prepping the crust, and mixing your festive batter.
Baking time
Once your cheesecake is prepped, it’ll need to bake for 45-50 minutes. Make sure your oven is preheated to 325°F to ensure even cooking.
Total time
From start to finish, you’re looking at around 1 hour and 15 minutes. Keep in mind, chilling the cheesecake for at least four hours (or overnight for best results) is essential for that perfect creamy texture.
Ready to impress your friends at the next holiday gathering? Check out our tips on how to make this cheesecake truly unforgettable!
For additional details on cheesecake techniques, you might find this article on cheesecake tips helpful.
Nutritional information for Christmas Red Velvet Cheesecake
When indulging in a Christmas Red Velvet Cheesecake, it’s crucial to savor every bite while being conscious of its nutritional profile.
Calories
This decadent dessert typically contains about 350 calories per slice. While it’s definitely a treat, those calories come with a rich flavor that makes it worth it during the holiday season.
Protein
A slice of this delightful cheesecake packs around 6 grams of protein. It’s not just sweet but also contributes to your daily protein needs, making it a balanced indulgence when enjoyed in moderation.
Sodium
With approximately 250 milligrams of sodium per slice, the Christmas Red Velvet Cheesecake helps you still keep an eye on your salt intake during those festive feasts. Always opt for lower-sodium ingredients when possible to make it even better for your dietary goals.
For a deeper dive into calorie counts and other nutritional information, check out Eatright.org for tips on enjoying your favorite treats responsibly. Also, if you’re curious about balancing desserts with healthier options, consider visiting FoodHealth.com for great ideas!
FAQs about Christmas Red Velvet Cheesecake
Can I make this cheesecake in advance?
Absolutely! One of the great things about Christmas Red Velvet Cheesecake is that it can be made a day or two in advance. In fact, allowing it to chill overnight can enhance its flavor and texture, making the cheesecake even creamier. Just be sure to wrap it tightly in plastic wrap to prevent any odors from your refrigerator from seeping in.
How should I store leftovers?
If you find yourself with leftover slices (which can be hard to resist), storing is easy! Place the cheesecake in an airtight container in the fridge, where it can last up to five days. Alternatively, if you’re trying to keep it for longer, consider freezing it. Just slice the cheesecake, wrap each piece tightly in plastic wrap, and then place them in a freezer-safe bag. Frozen pieces can last up to three months and make for a delightful treat later on.
What can I use instead of red food coloring?
If you’re not a fan of food coloring or prefer a more natural approach, there are alternatives you can explore. Beet juice is a popular choice; it gives a lovely hue without the artificial additives. For a lighter option, pomegranate juice can work beautifully, too; plus, it adds a unique flavor to your Christmas Red Velvet Cheesecake. You may need to adjust the amount of other liquids in your recipe, so keep that in mind!
For more tips and alternative ingredients, check out The Kitchn’s guide. Experimenting with recipes can be part of the fun, after all!
Conclusion on Christmas Red Velvet Cheesecake
The Christmas red velvet cheesecake is more than just a dessert; it’s a festive celebration on a plate! By combining the rich flavors of red velvet and creamy cheesecake, you’re not just treating your palate; you’re crafting a memory for loved ones around the table. As you prepare to serve this delicious masterpiece, consider the joy it brings—whether it’s the holiday party or a cozy family gathering. Pair it with hot cocoa or a refreshing peppermint latte for a delightful experience. For more tips on holiday baking, check out The Kitchn’s guide to holiday desserts. Happy baking, and may your holidays be sweet and full of joy!
PrintChristmas Red Velvet Cheesecake: The Best Indulgent Dessert Recipe
This Christmas Red Velvet Cheesecake is the perfect indulgent dessert to celebrate the holiday season.
- Prep Time: 45 minutes
- Cook Time: 35 minutes
- Total Time: 4 hours 20 minutes
- Yield: 8 servings
- Category: Dessert
- Method: Baking
- Cuisine: American
- Diet: Vegetarian
Ingredients
- 1 ¼ cups all-purpose flour
- 1 tablespoon cocoa powder
- 1 teaspoon baking powder
- ½ teaspoon salt
- 1 cup granulated sugar
- ½ cup unsalted butter, softened
- 2 large eggs
- 1 tablespoon red food coloring
- 1 teaspoon vanilla extract
- 1 cup cream cheese, softened
- 1 cup heavy cream
- ½ cup powdered sugar
Instructions
- Preheat your oven to 350°F (175°C).
- In a bowl, whisk together flour, cocoa powder, baking powder, and salt.
- In another bowl, beat sugar and butter until light and fluffy.
- Add eggs, red food coloring, and vanilla; mix well.
- Gradually add dry ingredients to the wet mixture.
- Pour the batter into a greased cheesecake pan and bake for 30-35 minutes.
- Let it cool completely before preparing the cheesecake layer.
- Beat cream cheese until smooth, then add heavy cream and powdered sugar; mix until fluffy.
- Spread the cheesecake mixture over the cooled red velvet cake.
- Chill the cheesecake for at least 4 hours before serving.
Notes
- Make sure to use food coloring specifically designed for baking.
- For a richer taste, chill overnight before serving.
Nutrition
- Serving Size: 1 slice
- Calories: 450
- Sugar: 30g
- Sodium: 250mg
- Fat: 25g
- Saturated Fat: 15g
- Unsaturated Fat: 7g
- Trans Fat: 0g
- Carbohydrates: 50g
- Fiber: 2g
- Protein: 6g
- Cholesterol: 100mg


")